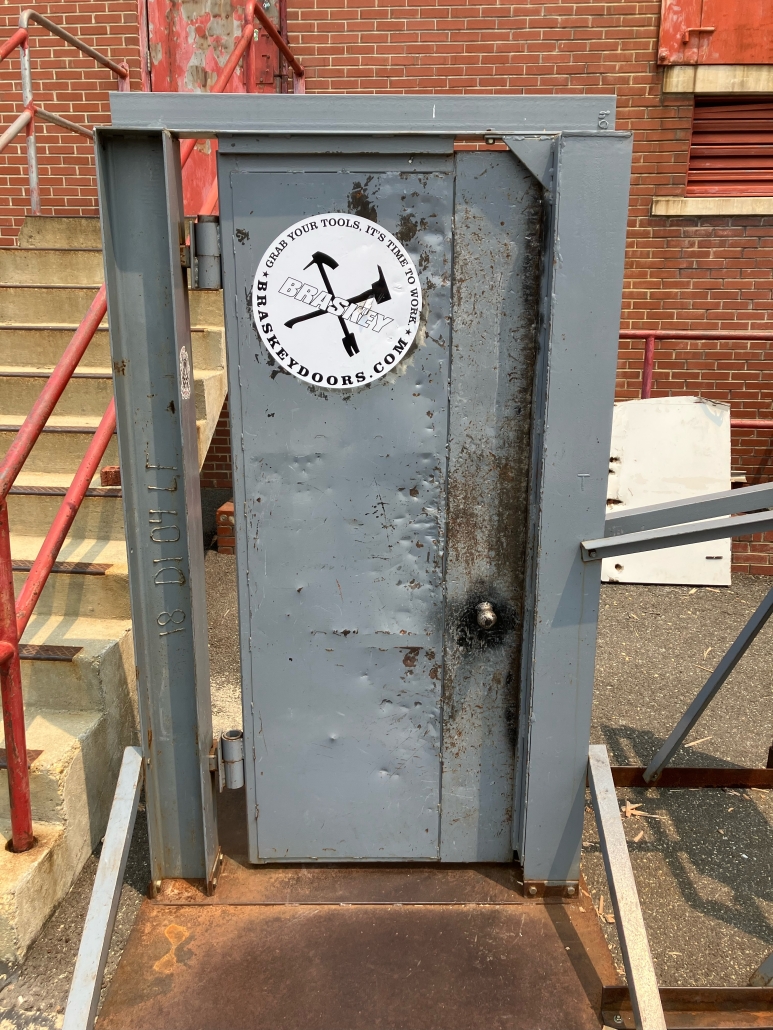
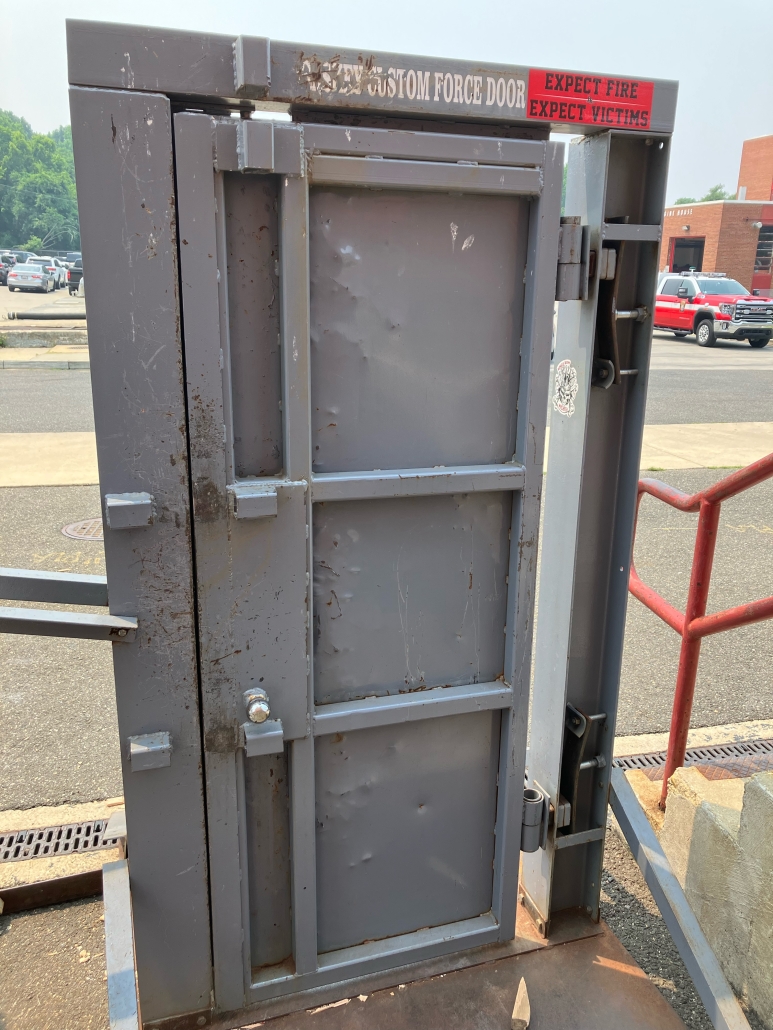
The Training Academy has been loaned a forcible entry prop, due to the efforts of Lt. Ric Caruso, RS-3-1. Lt. Caruso wrote this in his most recent email :
As all of you know a
Braskey Forcible Entry Door has been loaned to us along with an attached Crush prop for metal doors. In the very short time that the door has been at the TA the feedback has been positive regarding the design of the door. Attached you will find the Product Manual, some of you have already seen this, but for those of you who were there today and helped with setup, I figured a copy would be beneficial since you’ll probably be using it most with recruit training. This door has made its rounds between NOVA, Baltimore, OCMD, and now DC (along with others) over the last 4 years. I anticipate we’ll have it for at least a few months. You’ll notice the door only has minor cosmetic issues, most from people shocking the door in an incorrect area.
A few questions came up today while setting up the door so I called Seth Taylor (the designer/fabricator) and he gave me the following info to pass along:
– The door can be forced anywhere opposite the hinge side (high, middle, low) since the door jam runs the full length of the frame.
-Typically loading either the doorknob lock or deadbolt with lumber is a good starting point for recruits/members who are noice with forcible entry. Loading both the doorknob and deadbolt increases difficulty and works well for members with greater ability, and finally adding the top lock creates the greatest challenge with forcing.
– You can shock the door anywhere (high/low) on the first 1/3 of the right side – basically between the seam where the door is reinforced and the door frame (it’s pretty obvious where the door is beefed up). You can see where others disregarded that and some minor damage is starting to appear towards the center of the door.
– Adjusting hinge “tightness” of the door – They came up with a pretty ingenious idea of using leaf springs to set difficulty/tightness. Adjustments should only be made to the top hinge spring (for now as we put the prop through the paces). The bottom hinge/spring basically keeps the door plum and square (basically holds door in place, supports most weight, and prevents racking) while the top hinge is used to adjust difficulty/tightness of door. Seth recommends initially leaving a 1/4 – 1/2” gap between head of TOP large bolt and leaf spring, closing gap/tightening large bolt into leaf spring increases difficulty of forcing. The top bolt can be tightened into the leaf spring as folks progress and become more proficient. He did say that you can run the bolt tight enough on the top side to make it nearly impossible to force.
– Hydra-rams are fine to use on the door. Seth did recommend setting only the door knob or dead bolt lock as people first start out but you can progress to locking all 3 positions (top, deadbolt, and doorknob)
– Like the blue door, wet wood increases difficulty.
– Crush Prop – attached to the door frame you will find an additional option that doesn’t come standard with the door called a Crush prop. The idea is to help members become proficient at gaining entry into an outward opening steel door. As you probably have all encountered, many times forcing these style doors can be difficult because the bar skins the metal preventing the FE firefighter from getting the adze/forks behind the door itself. Mike Parone (the blue door guy makes one of these props as well which appears to be very similar to this one. Steel doors unto 36” can be cut in half or thirds (crossways) and slid into the prop allowing members to practice the above. Tech. Evans is working on locating steel doors to practice with.
If a door is less than 36” wide, then blocking needs to be placed next to the practice piece (OCFD gave us 2 sections of door that still has limited space available to use in the crush prop. You’ll notice a 2×6 and a couple of wedges need to be installed since the practice door is only about 30” wide.)
I stole this link from Parone which demonstrates multiple ways to deal with metal doors that are skinned, food for thought.
https://youtu.be/fzkVi1J328Q– Seth did mention that if the door and/or frame starts to look out of line or racked then most likely the supporting bolts are becoming loose from use. He describes in the product manual how to fix this by realigning the frame, retightening the bolts, and then retightening the supporting angle iron.
Thanks for the help this morning fellas. Let me know if you guys have any questions or concerns.
– Rick


